Preparing for LED Strip Installation
Choosing the Right LED Light Strips
Selecting the appropriate LED light strips is crucial for a successful ceiling installation. Consider factors such as brightness, color temperature, and power requirements. USKYLED's 1010 Flexible White LED Strip offers industrial-grade durability with a 24V low-voltage operation, making it ideal for both indoor and outdoor applications. Its IP65-rated silicone encapsulation provides excellent protection against environmental factors, ensuring longevity and consistent performance.
Measuring and Planning
Accurate measurements are essential for a professional-looking installation. Measure the length of your ceiling where you plan to install the LED light strips. Account for corners, obstacles, and any design patterns you wish to create. It's advisable to create a detailed layout plan before proceeding with the installation. This step will help you determine the required length of LED strips and identify potential challenges in the installation process.
Gathering Necessary Tools and Materials
Assemble all the tools and materials needed for the installation. This typically includes LED light strips, a power supply, connectors, mounting clips or adhesive tape, wire strippers, scissors, and a multimeter. If you're working with USKYLED's products, you'll appreciate the pre-applied 3M VHB adhesive that allows for tool-free mounting on most surfaces. However, having additional mounting options ensures you're prepared for various surface types.
Step-by-Step Installation Process
Surface Preparation
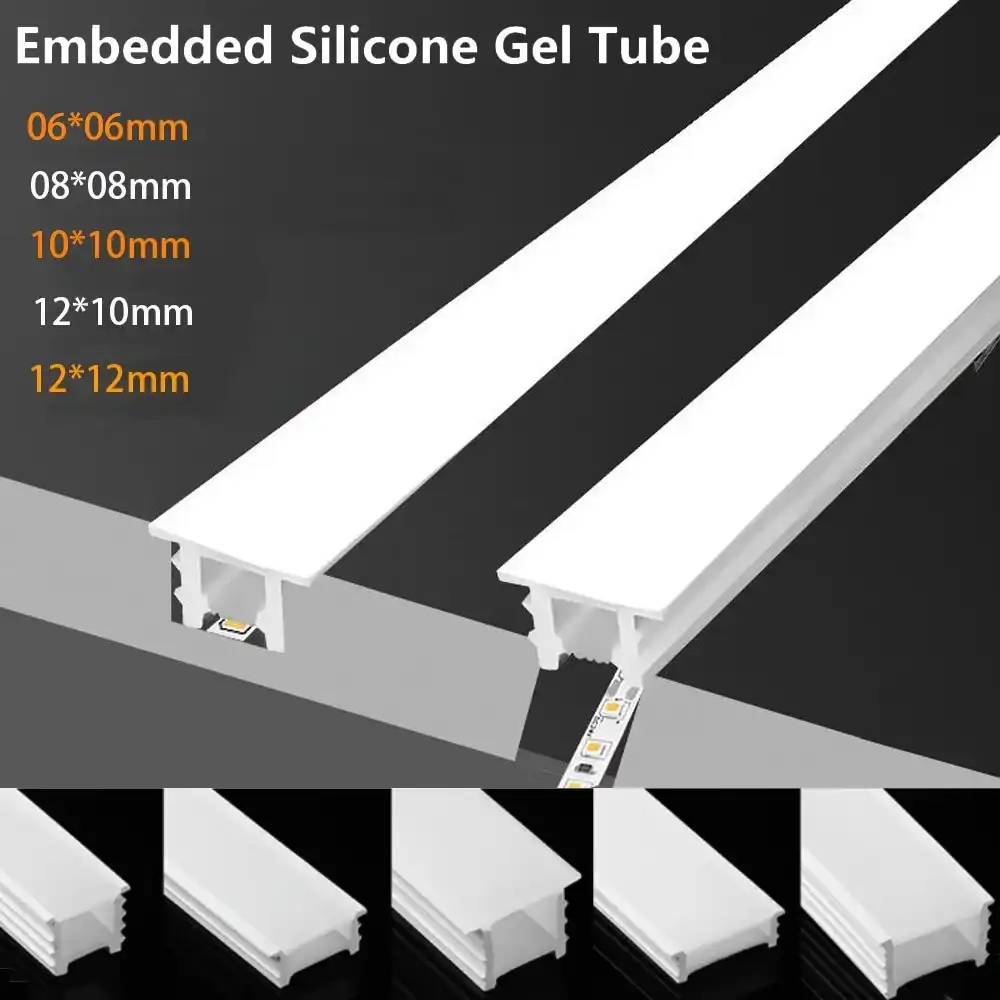
Proper surface preparation is essential for a durable and secure installation. Begin by thoroughly cleaning the ceiling with a mild detergent and water mixture to remove dust, grease, and debris that may interfere with adhesion. After cleaning, let the surface dry completely before continuing. For ceilings that are textured, uneven, or difficult to work with, using mounting clips is highly recommended. These clips provide extra stability and ensure that your installation remains firmly in place over time.
Attaching LED Strips
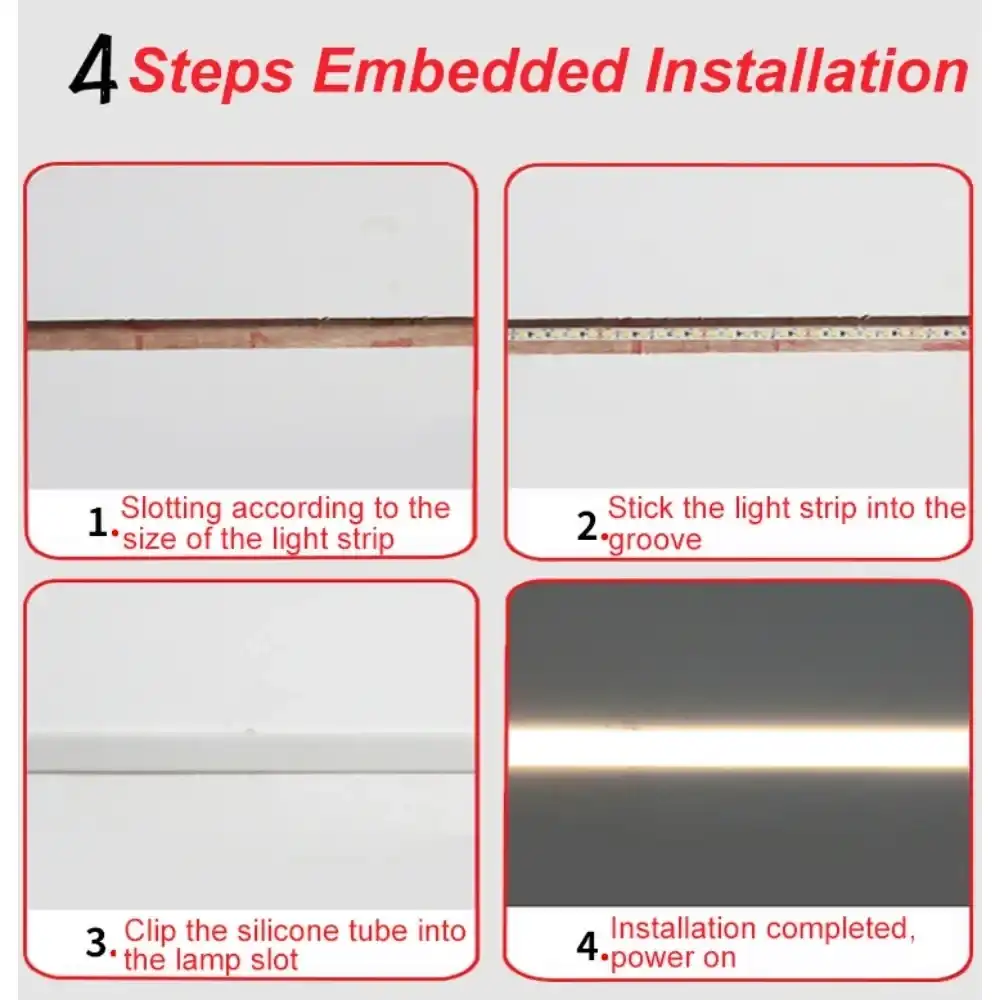
Begin attaching the LED light strips according to your layout plan. If using adhesive-backed strips like those from USKYLED, peel off the protective backing and carefully press the strip onto the clean surface. Work in small sections to ensure proper alignment. For strips without adhesive backing, use mounting clips placed at regular intervals. In corners or along curves, be mindful of the strip's bend radius to avoid damaging the internal components.
Connecting Power and Controls
Begin by connecting the LED strips to the power supply, making sure the voltage requirements are properly matched to avoid performance issues. USKYLED’s advanced 24V system delivers greater safety, higher efficiency, and lower power consumption compared to conventional 12V options, making it a more reliable choice. When installing multiple strips, always use the correct connectors to ensure a continuous and stable circuit. For additional convenience and flexibility, you can integrate dimmer switches or smart control devices that work seamlessly with your LED system.
Finishing Touches and Troubleshooting
Concealing Wires and Power Supply
For a polished look, conceal wires and the power supply. Use wire channels or tuck wires behind molding when possible. If working with drop ceilings, you can often hide components above the tiles. Ensure all connections are secure and protected from potential damage. USKYLED's flexible rope design allows for seamless integration around complex geometries, making it easier to achieve a clean, professional appearance.
Testing and Adjusting
Before finalizing the installation, thoroughly test the LED light strips. Check for consistent illumination along the entire length and verify that all connections are secure. If you notice any dark spots or flickering, double-check the connections and ensure the power supply is adequate for the total length of installed strips. Adjust the positioning or connections as needed to achieve the desired lighting effect.
Maintenance and Care Tips
To ensure long-lasting performance of your ceiling LED light strips, regular maintenance is key. Gently dust the strips with a soft, dry cloth to prevent buildup that may reduce brightness or efficiency. Avoid harsh cleaning products or exposing the installation to excessive moisture, as these can cause damage. When properly cared for, premium LED strips such as those from USKYLED can deliver reliable, high-quality illumination for up to 50,000 hours, offering both durability and energy efficiency in your lighting setup.
Conclusion
Installing LED light strips in your ceiling can transform your space with elegant, efficient illumination. By following these professional installation techniques and using high-quality products like those offered by USKYLED, you can achieve stunning results that enhance both the aesthetics and functionality of your environment. Remember to prioritize safety, plan meticulously, and don't hesitate to seek expert advice for complex installations. With the right approach, your ceiling LED lighting can become a standout feature in your home or commercial space.

FAQ
Can I install LED light strips in a bathroom ceiling?
Yes, but ensure you use waterproof LED strips rated for damp environments. USKYLED's IP65-rated strips are suitable for bathroom installations.
How do I calculate the power supply needed for my LED strips?
Multiply the wattage per meter of your LED strip by the total length in meters. Choose a power supply that exceeds this calculated wattage by at least 20% for safety.
Are LED light strips dimmable?
Many LED strips are dimmable, but you'll need a compatible dimmer and power supply. Check the specifications of your chosen LED strip for dimming capabilities.
Transform Your Space with USKYLED's Professional LED Lighting Solutions
USKYLED is your trusted partner in innovative LED lighting solutions. As a leading manufacturer and exporter, we offer a wide range of high-performance products, from flexible linear lights to smart track systems. Our commitment to advanced LED technology, custom OEM/ODM solutions, and sustainability sets us apart in the global market. Experience the difference with our energy-efficient, long-lasting, and aesthetically pleasing lighting options. For expert advice on your next lighting project or to explore our product range, contact our dedicated team at sales@uskyled.com.
References
1. Johnson, E. (2022). "Professional Techniques for Ceiling LED Strip Installation." Lighting Design Quarterly, 45(3), 78-85.
2. Smith, A. & Brown, R. (2023). "Energy-Efficient Lighting Solutions: A Comprehensive Guide to LED Strip Applications." Journal of Sustainable Illumination, 12(2), 156-170.
3. Lee, S. (2021). "Advances in Flexible LED Technology for Architectural Lighting." Proceedings of the International Conference on Lighting Design and Engineering, 234-249.
4. White, M. (2023). "Best Practices for LED Strip Installation in Commercial Spaces." Building Systems Technology, 18(4), 92-105.
5. Garcia, R. & Taylor, P. (2022). "Comparative Analysis of LED Strip Lighting Systems for Residential Applications." Energy and Buildings, 76, 210-225.


![What is Dimmable Track Lighting for Museum: Best Guide [2025]](/icms/upload/0d08cc601e7611f0b542b3ca0c0f4a83/pic/knowledgemanager-knowledgepic/e7879f32605f11f081911f363b8c1ed0/Directory/20250717 dimmable track lighting -1(1)_1752739217941.webp)
