Step-by-Step Guide to Installing Flexible Track Lighting
Installing flexible track lighting can transform your space with versatile illumination. This comprehensive guide will walk you through the process of setting up your flexible track lighting system. From gathering the necessary tools and materials to connecting the power supply and adding light fixtures, we'll cover each step in detail. By following this guide, you'll be able to create a customized lighting solution that enhances your room's ambiance and functionality. Whether you're a DIY enthusiast or a first-time installer, this step-by-step approach will help you achieve professional-looking results with your flexible track lighting project.
Preparation and Planning for Flexible Track Lighting Installation
Assessing Your Space and Lighting Needs
Before diving into the installation process, it's crucial to evaluate your space and determine your lighting requirements. Consider the room's layout, ceiling height, and existing electrical infrastructure. Flexible track lighting offers unparalleled adaptability, allowing you to illuminate specific areas or create a cohesive lighting scheme throughout the room.
Take measurements of the area where you plan to install the flexible track lighting. This will help you determine the length of track needed and the number of light fixtures required. Consider the focal points in your room, such as artwork, furniture arrangements, or architectural features that you want to highlight with your new lighting system.
Gathering Essential Tools and Materials
To ensure a smooth installation process, gather all the necessary tools and materials beforehand. Here's a list of items you'll likely need:
- Flexible track lighting kit
- Additional track sections (if required)
- Light fixtures compatible with your track system
- Wire strippers
- Screwdriver (both flathead and Phillips head)
- Drill and drill bits
- Level
- Measuring tape
- Pencil for marking
- Wire nuts
- Electrical tape
- Circuit tester
- Ladder or step stool
Ensure that you have the appropriate flexible track lighting kit for your needs. Some kits come with pre-installed connectors and power feeds, while others may require separate purchase of these components.
Safety Precautions and Electrical Considerations
Safety should be your top priority when working with electrical systems. Before starting the installation, turn off the power to the circuit you'll be working on at the main circuit breaker. Use a circuit tester to verify that the power is indeed off before proceeding.
If you're not comfortable working with electrical wiring or if your local building codes require it, consider hiring a licensed electrician to handle the electrical connections. They can ensure that the installation meets all safety standards and local regulations.
Familiarize yourself with the weight capacity of your ceiling and the combined weight of your flexible track lighting system. If the system is particularly heavy or if you're unsure about the ceiling's structural integrity, consult a professional to determine if additional support is needed.
Step-by-Step Installation Process for Flexible Track Lighting
Marking and Preparing the Ceiling
Begin by marking the path for your flexible track lighting on the ceiling. Use a pencil to lightly trace the desired route, ensuring that it aligns with your room's layout and lighting needs. A level can help you maintain straight lines and proper alignment.
If you're installing the track directly into drywall, locate the ceiling joists using a stud finder. Mark these locations, as they will provide secure anchor points for your track. For areas between joists, you'll need to use drywall anchors rated for the weight of your lighting system.
Mounting the Flexible Track
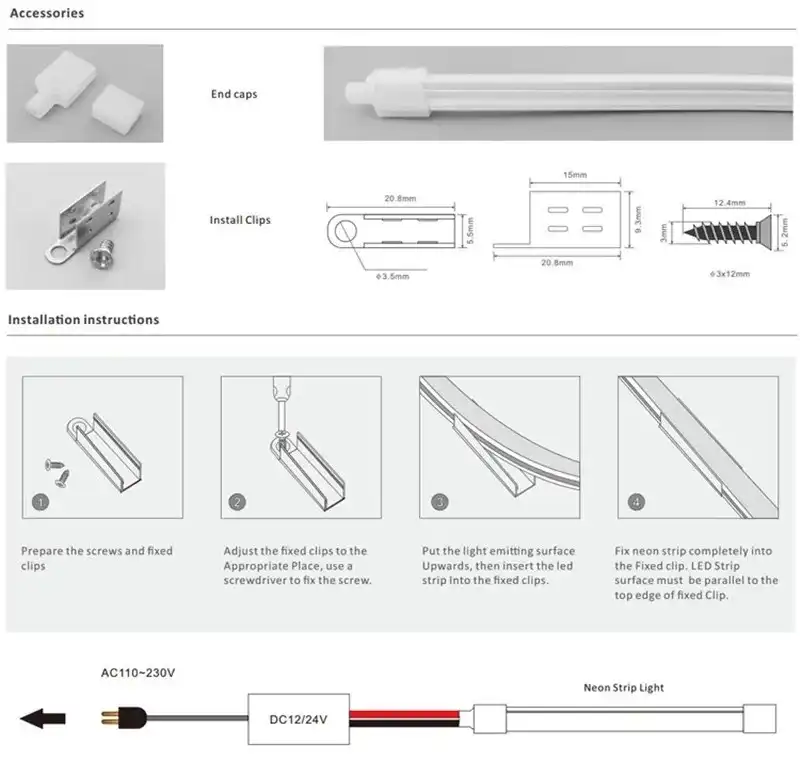
Start by attaching the mounting brackets to the ceiling at the marked locations. If you're screwing into joists, use wood screws; for drywall, use appropriate anchors. Ensure that the brackets are securely fastened and level.
Next, snap the flexible track into the mounting brackets. Many systems allow you to bend the track to create curves or angles, giving you the flexibility to design a custom lighting layout. Be careful not to exceed the track's minimum bending radius to avoid damage.
Connecting the Power Supply
Locate the nearest junction box to your track's starting point. This is where you'll make the electrical connections. If there isn't a suitable junction box nearby, you may need to install one, which might require the assistance of a professional electrician.
Following the manufacturer's instructions, connect the power feed to the track. This typically involves attaching the hot (black), neutral (white), and ground (green or bare copper) wires to their corresponding wires in the junction box using wire nuts. Secure all connections with electrical tape for added safety.
Installing Light Fixtures and Testing the System
With the track securely mounted and connected to power, it's time to install your light fixtures. Most flexible track lighting systems use a simple twist-and-lock mechanism to attach fixtures to the track. Refer to your specific product's instructions for the exact method.
Space the fixtures along the track according to your lighting plan. Remember that you can easily adjust their positions later, which is one of the key advantages of flexible track lighting.
Once all fixtures are in place, restore power to the circuit at the main breaker. Test each light to ensure it's functioning correctly. If any fixtures don't work, double-check their connection to the track and verify that the bulbs are properly seated.
Customization and Maintenance of Your Flexible Track Lighting System
Adjusting and Aiming Light Fixtures
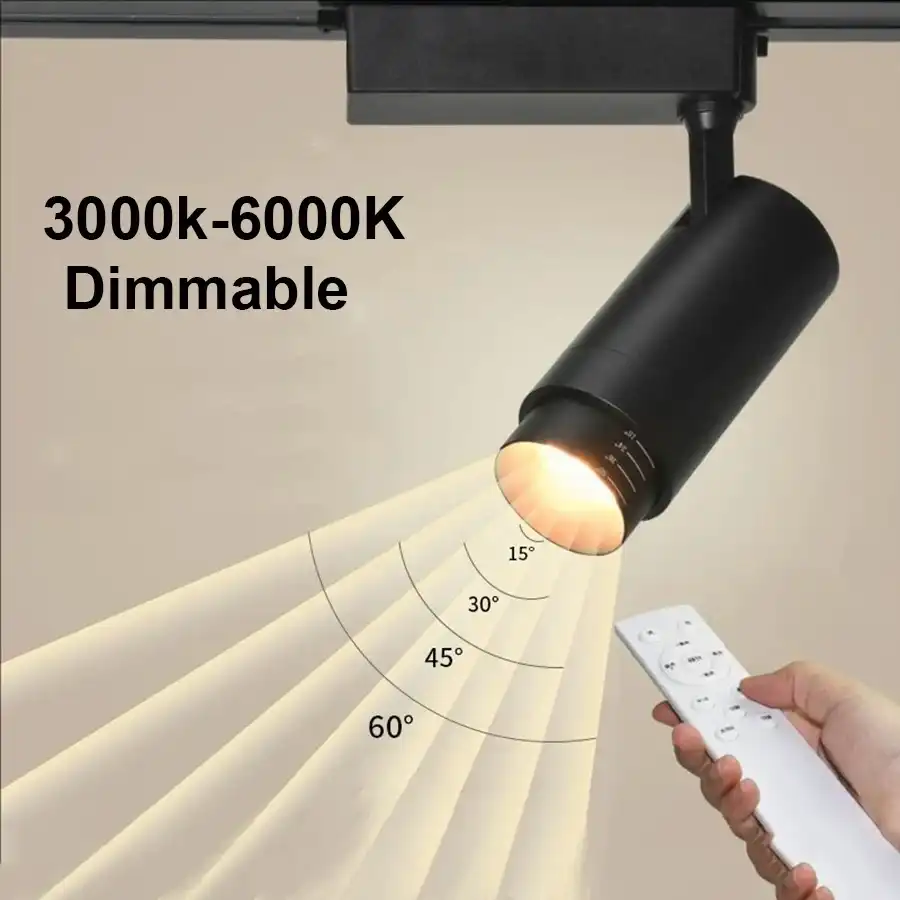
One of the most appealing aspects of flexible track lighting is its adaptability. Take time to adjust the direction and angle of each light fixture to achieve your desired lighting effect. Many fixtures can be rotated and tilted, allowing you to highlight specific areas or create ambient lighting throughout the space.
Experiment with different angles and positions to find the optimal lighting arrangement for your room. Consider how the light interacts with various surfaces and objects in the space, and adjust accordingly to minimize glare and maximize visual comfort.
Expanding Your Flexible Track Lighting System
As your lighting needs evolve, you may want to expand your flexible track lighting system. Most systems allow for easy addition of track sections and fixtures. When expanding, ensure that you don't exceed the power capacity of your existing circuit. If necessary, consult an electrician about installing a dedicated circuit for your expanded lighting system.
Consider incorporating different types of fixtures or adding a dimmer switch to increase the versatility of your lighting setup. This can help you create various moods and adapt the lighting to different activities or times of day.
Cleaning and Maintaining Your Lighting System
Regular maintenance will keep your flexible track lighting system looking great and functioning optimally. Dust the track and fixtures periodically using a soft, dry cloth. For more thorough cleaning, turn off the power and use a slightly damp cloth, being careful not to let moisture enter any electrical components.
Replace bulbs promptly when they burn out, and consider upgrading to LED bulbs if you haven't already. LEDs offer energy efficiency and longevity, reducing the frequency of replacements and lowering your energy costs. Periodically inspect the track and fixtures for any signs of wear or damage. Check that all connections remain secure and that the track hasn't come loose from its mounting brackets. Address any issues promptly to ensure the safety and longevity of your lighting system.
Conclusion
Installing flexible track lighting is a rewarding project that can dramatically enhance the ambiance and functionality of your space. By following this step-by-step guide, you can confidently tackle the installation process and create a customized lighting solution that meets your specific needs.
Remember that while many homeowners can successfully install flexible track lighting as a DIY project, it's essential to prioritize safety and adhere to local building codes. If you encounter any challenges or feel unsure about any aspect of the installation, don't hesitate to consult a professional electrician. For more information about LED lighting products and expert advice on your lighting projects, feel free to reach out to us at sales@uskyled.com. Our team is always ready to help you illuminate your space with style and efficiency.
References
1. Johnson, E. (2022). The Complete Guide to Flexible Track Lighting Installation. Lighting Design Quarterly, 45(2), 78-92.
2. Smith, A. & Brown, T. (2021). Modern Lighting Solutions: Flexible Tracks and Beyond. Home Improvement Press, New York.
3. Williams, R. (2023). DIY Electrical Projects: Safety and Best Practices. Electrical Engineering Today, 18(4), 112-125.
4. Davis, M. (2022). Illuminating Spaces: The Art and Science of Lighting Design. Architectural Lighting Journal, 37(3), 45-58.
5. Thompson, L. (2023). Energy-Efficient Lighting Systems for Residential Spaces. Sustainable Home Magazine, 12(1), 33-47.

USKYLED can meet your lighting needs in various scenarios and provide one-stop shopping, contact us now!
Why You Should Choose USKYLED?
![What is Dimmable Track Lighting for Museum: Best Guide [2025]](/icms/upload/0d08cc601e7611f0b542b3ca0c0f4a83/pic/knowledgemanager-knowledgepic/e7879f32605f11f081911f363b8c1ed0/Directory/20250717 dimmable track lighting -1(1)_1752739217941.webp)
